
Configuring Windows Firewall for Local Proxy Forwarders
Table of Contents
When running local proxy apps (such as SOCKS5 desktop clients or port forwarders) on a Windows PC to share proxies with your WifiSocks router, Windows Defender Firewall must allow incoming local network connections. This guide walks you through creating the required firewall rule in Windows.
[!NOTE] Neutral Tool Notice: WifiSocks is an independent routing software platform. WifiSocks does not operate or sell third-party proxy tools. Users configure their own network environments.
1. Step-by-Step Firewall Setup
Open Windows Firewall Advanced Settings
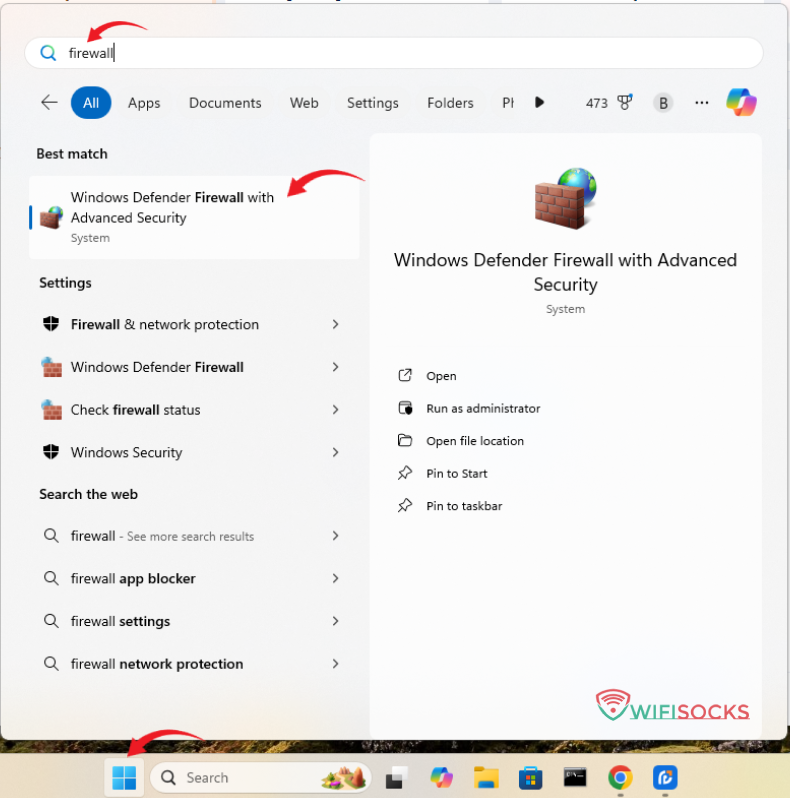
- Open the Windows Start menu.
- Search for and open Windows Defender Firewall with Advanced Security.
- In the left sidebar, click Inbound Rules.
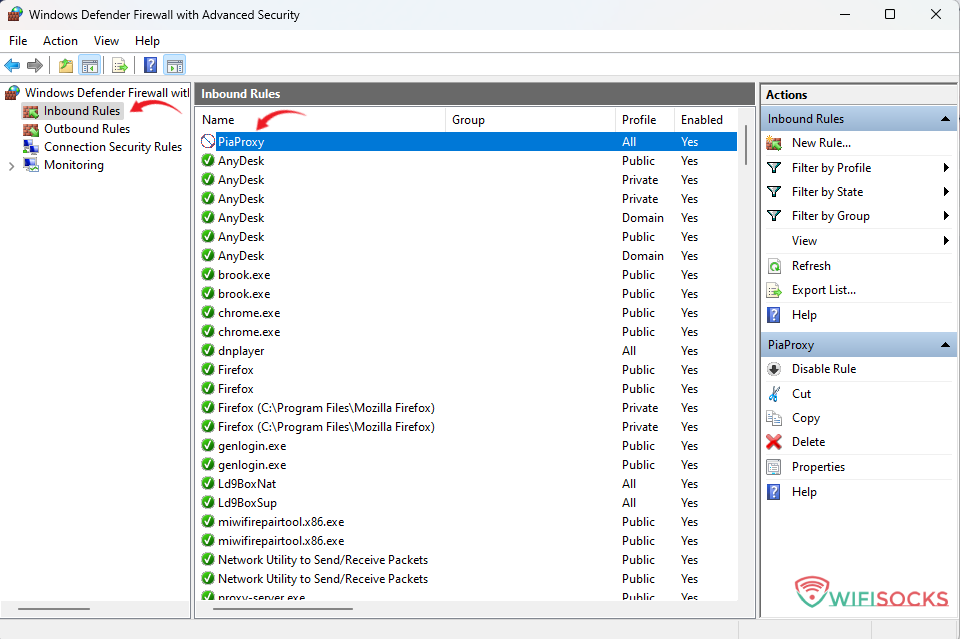
Option A: Allow the Proxy Application (Easiest)
- Look through the Inbound Rules list for your proxy application name.
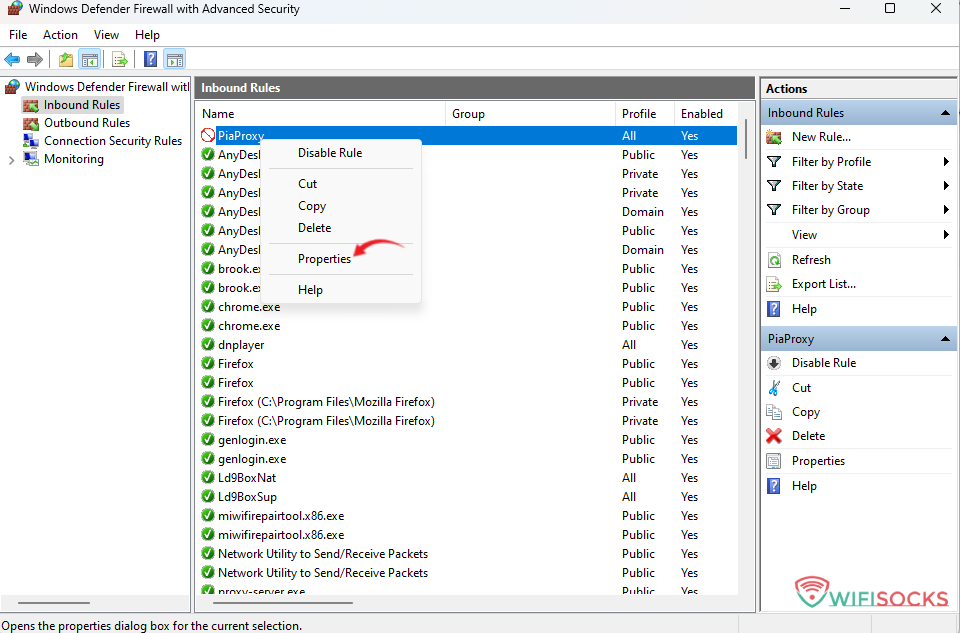
- Right-click the application entry and select Properties.
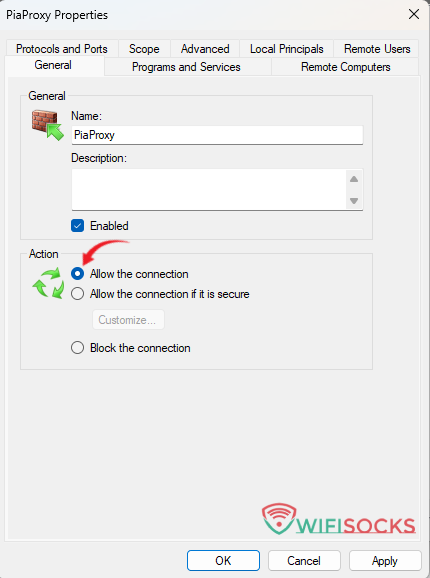
- Under the General tab, select Allow the connection.
- Click OK to save.
- Repeat for any other entries associated with the application.
Option B: Open the Proxy Port Range
If your application is not in the list, open its listening ports directly:
- In the right-hand Actions panel, click New Rule…
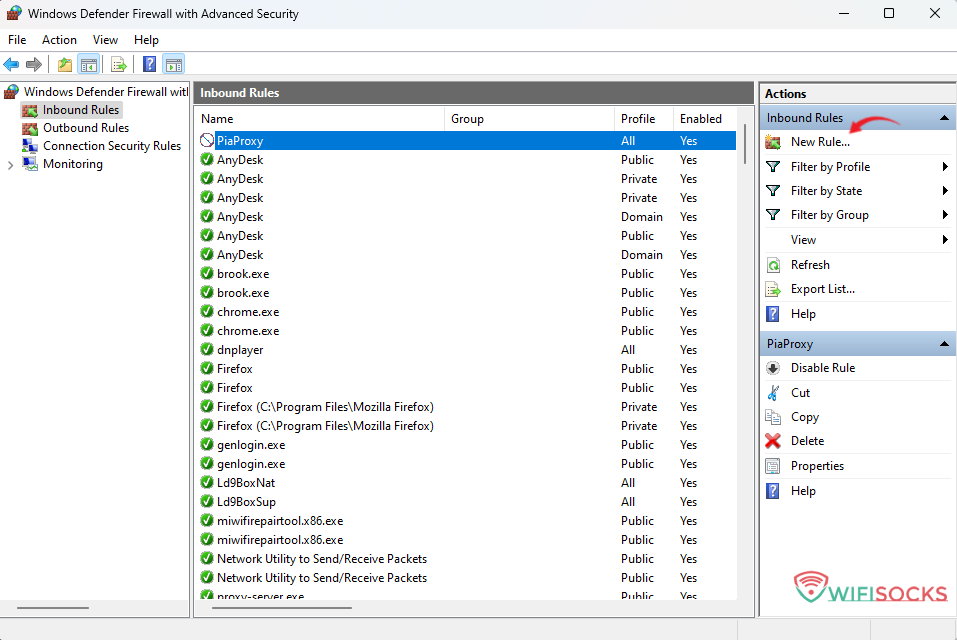
- Rule Type: Select Port and click Next.
- Protocol and Ports:
- Select TCP.
- Select Specific local ports and enter your port or range (for example:
40000-40100or40000). - Click Next.
- Action: Select Allow the connection and click Next.
- Profile: Make sure Private and Domain networks are checked → Click Next.
- Name: Type
WifiSocks Local Proxyand click Finish.
2. Testing Connection with the Router
- Open the WifiSocks router dashboard (
http://192.168.105.1). - Go to Proxy Routing and assign your forwarded proxy (e.g.
socks5://192.168.105.99:40000) to a test device. - Click Update.
- The router will perform a handshake. If the firewall rule is correct and the desktop app is listening, the device will connect immediately.

